
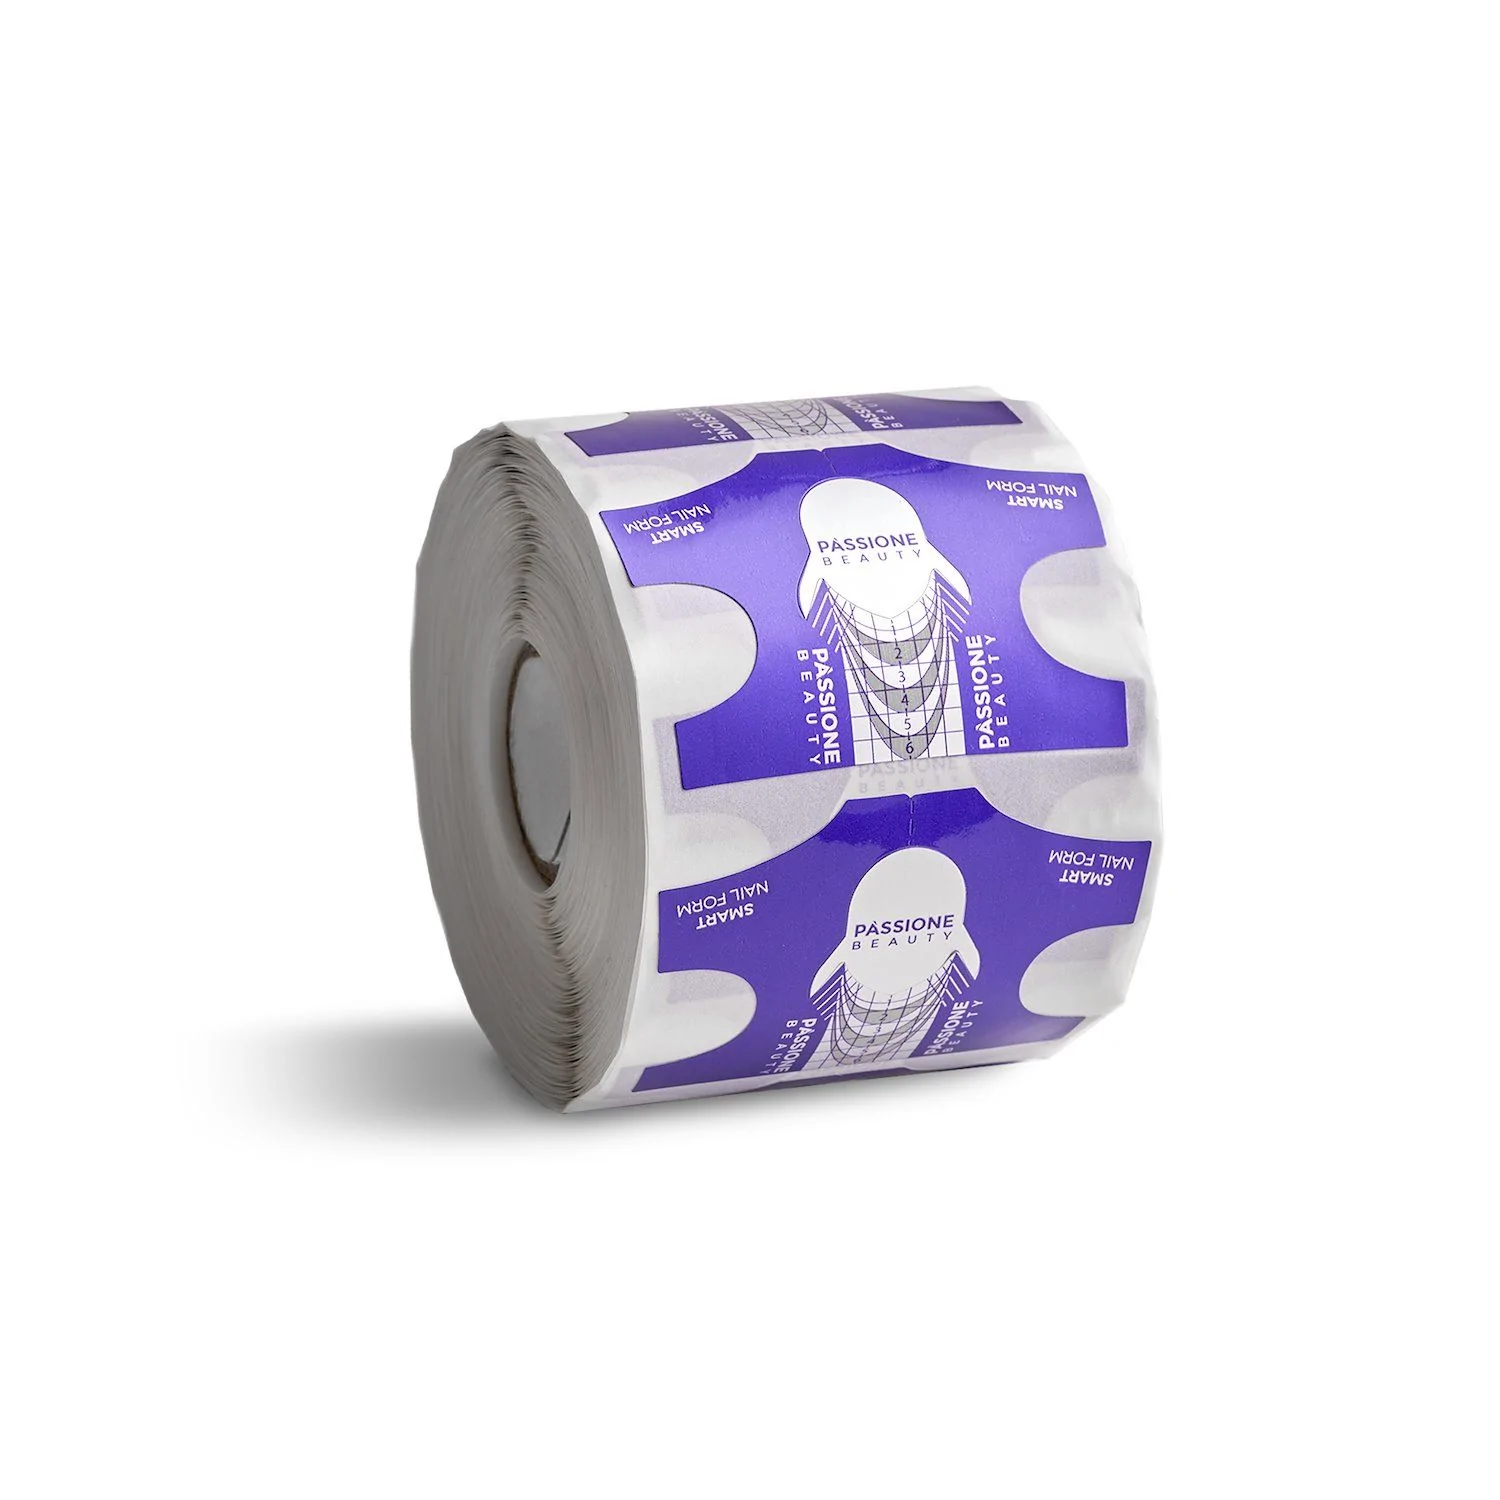


Smart Nail Form 500 pcs
- Smart nail forms in aluminium for professional use
£9.99
In stock
Sign up for Passione Beauty Club 💅 to get 9 points with this purchase.
+ 9 Passione Beauty Club points 💅
Same-day shipping for orders placed before 2 PM
Free shipping for orders over €70
Secure payments
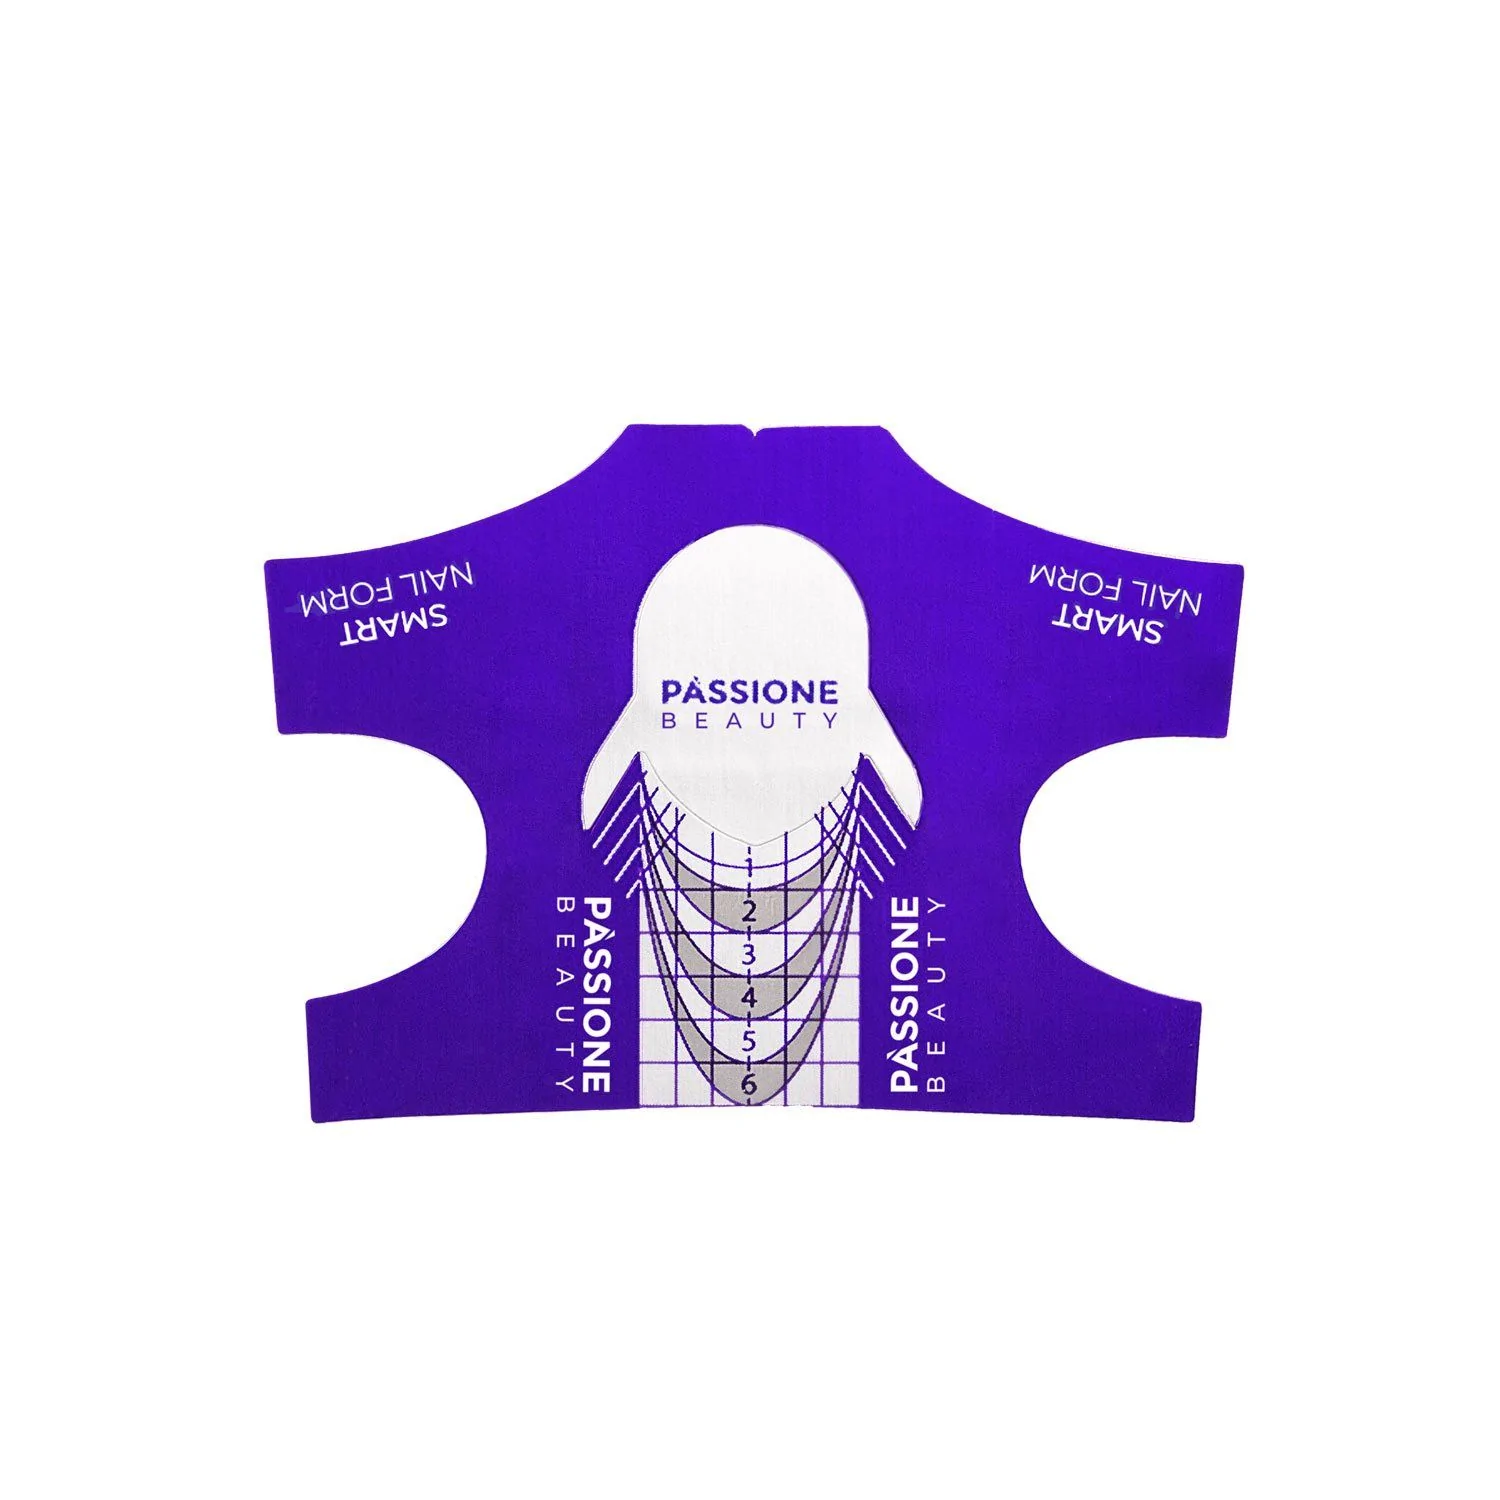
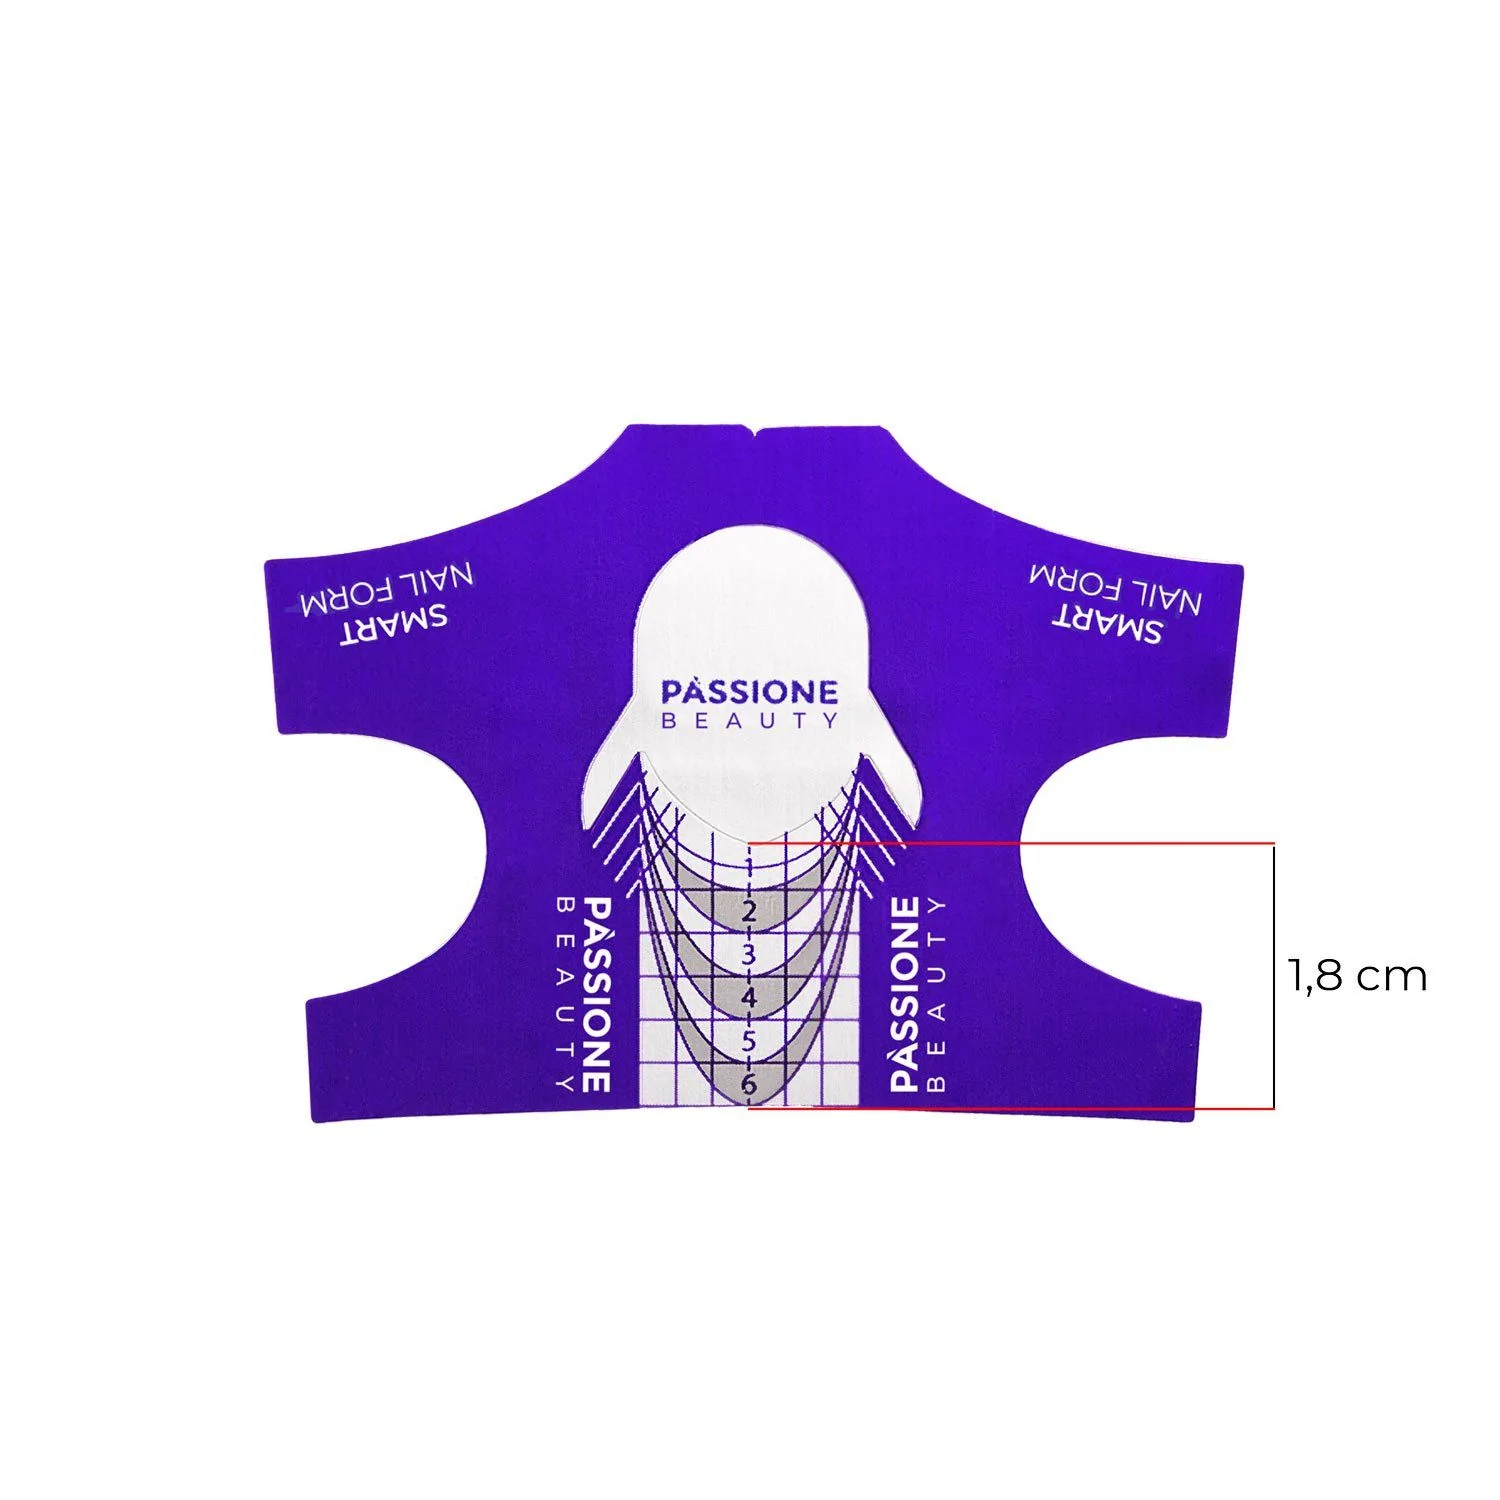
Smart Nail Forms in Aluminium for Professional Use
Support, precision and stability during nail extension.
- Construction technique:
- Small stretches
Smart Nail Forms are made up of 3 layers of different materials: adhesive paper, aluminium core and plastic-coated paper.
They allow nail extensions up to length 6.
The aluminium thickness ensures the form holds its shape during use.
- Self-adhesive and easy to handle, with convenient side cuts
- Printed guide lines for customised cuts
- Material designed to maintain shape during use
- Practical roll format, 500 pcs
- Printed guide lines for customised cuts
- Material designed to maintain shape during use
- Practical roll format, 500 pcs
- Construction technique: Small stretches
- For professional use
Made in: China